Set up email sending (SMTP or Amazon SES)
Connect a sending account so your campaigns can go out.
Before you can send an email campaign, you need to connect a sender - either an SMTP account or Amazon SES. This is at /admin/smtp-settings.
Before you start Have your provider's details ready: SMTP host, port, username, and password; or for SES, an access key, secret, and region.
Add a sender
-
Open Settings → SMTP Settings → Add Configuration. Go to
/admin/smtp-settingsand click Add Configuration. -
Provider. Choose SMTP or Amazon SES.
-
General Information. Give it a name you'll recognize (e.g. "Marketing – Brevo").
-
Server Configuration / AWS Configuration.
- SMTP - host, port (usually 587), and the encryption option (e.g. TLS).
- Amazon SES - pick the AWS region (e.g. Asia Pacific (Mumbai)).
-
Authentication / AWS Credentials. SMTP username and password, or SES access key and secret.
-
Sender Information. The from name and from email recipients will see. The from address must be verified with your provider.
-
Save. HexaFloww runs a live connection test before saving, so wrong credentials are caught now rather than mid-campaign.
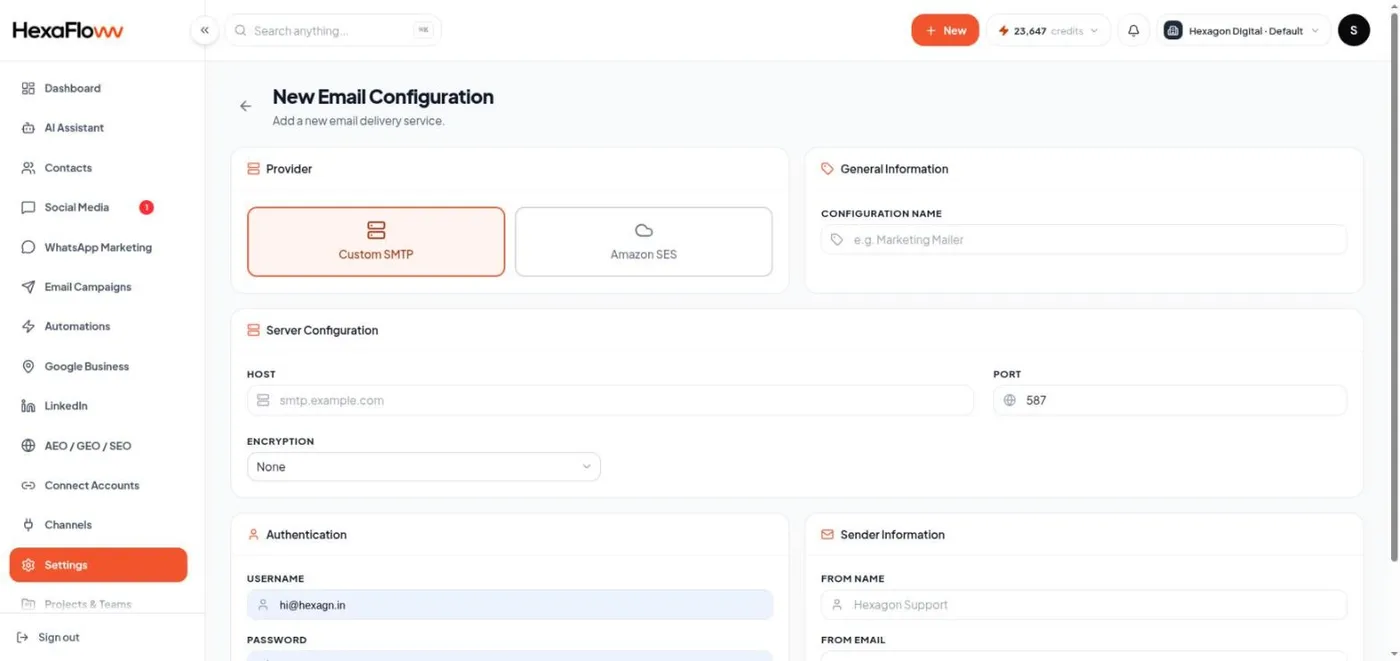
Email sender configuration form
Test it
From the configurations list, use the Test button, enter an address, and send yourself a message to confirm delivery.
Common problems
- "Authentication failed (535)" - wrong username or password, or your provider needs an app password.
- "Connection timed out" - wrong host or port, or a firewall is blocking it.
- SES "email address not verified" - verify the from address (or domain) in the SES console first.
- Emails land in spam - verify your domain (SPF, DKIM) with your provider, and warm up a new sender slowly.
A brand-new sender should ramp up gradually. When you create a campaign, HexaFloww warns you if the sender is less than two weeks old and offers a slower sending speed.